Garmin not importing GPX? Here is the fix!
Share on:
Importing a GPX file into a Garmin watch or a Garmin edge is something quite usual when you plan an activity. Many tools help you create a route as a GPX file you can download on your Garmin device. Unfortunately, the process sometimes fails, and it is hard to understand why.
The purpose of this article is twofold: understanding why it fails and giving you an easy way to fix it.
Why importing my GPX into Garmin fails?
If Garmin is refusing to import a GPX, it is likely that you are trying to load an activity instead of a course. The other reason is that your GPX file is built differently from what Garmin considers an acceptable GPX.
To make it short, there are different types of GPX files that depend on the information built into them, making them similar to activities or courses. I will explain in much more depth this concept in a dedicated chapter below.
For now, keep in mind that it exists many tools that create GPX files. The problem is these tools create GPX files differently, and GPX files can be many things: waypoints, tracks, and routes. Moreover, each type can have various levels of information from really detailed: elevation, time, description, URL, name, etc, to very basic (only coordinates).
Garmin Connect – and thus the devices using it – expects a specific type of GPX for activities and another one for courses.
How to upload a GPX file to a Garmin watch or Garmin Edge
As said before, many tools can create GPX files, and they don’t always specify if it’s a track, a route, or even something else. If you are not a techy or don’t want to spend too much time figuring things out, there is a simple online tool: https://www.alltrails.com/converter. This tool will convert your original GPX file to one that will be compatible with Garmin Connect.
Here are the steps to upload a GPX file to a Garmin watch or Garmin Edge:
- Go to https://www.alltrails.com/converter
- Upload your file
- Select “Downlad as GPX Route“
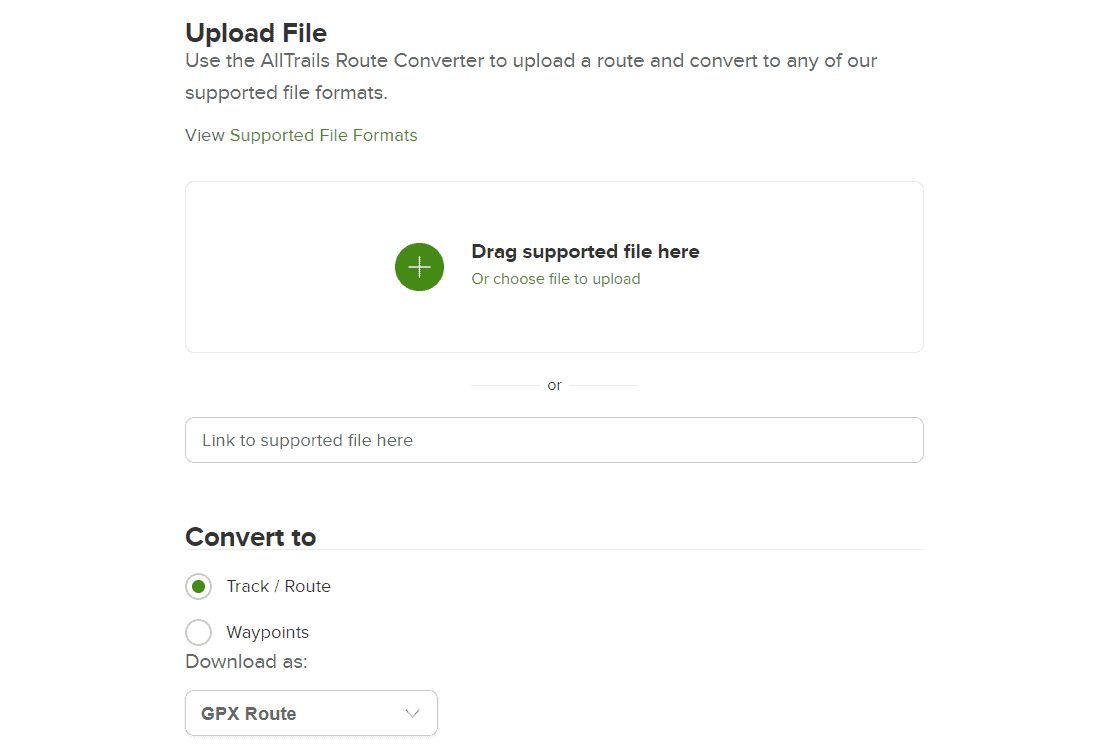
- Click on “Convert file” to download the new GPX.
- Go to https://connect.garmin.com/signin/
- In “Training & Planning” go to “Courses”
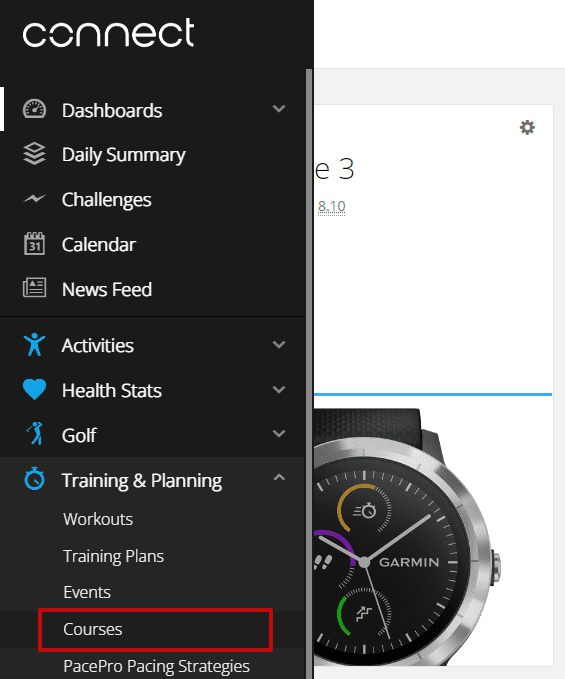
- Click on import and upload your new GPX
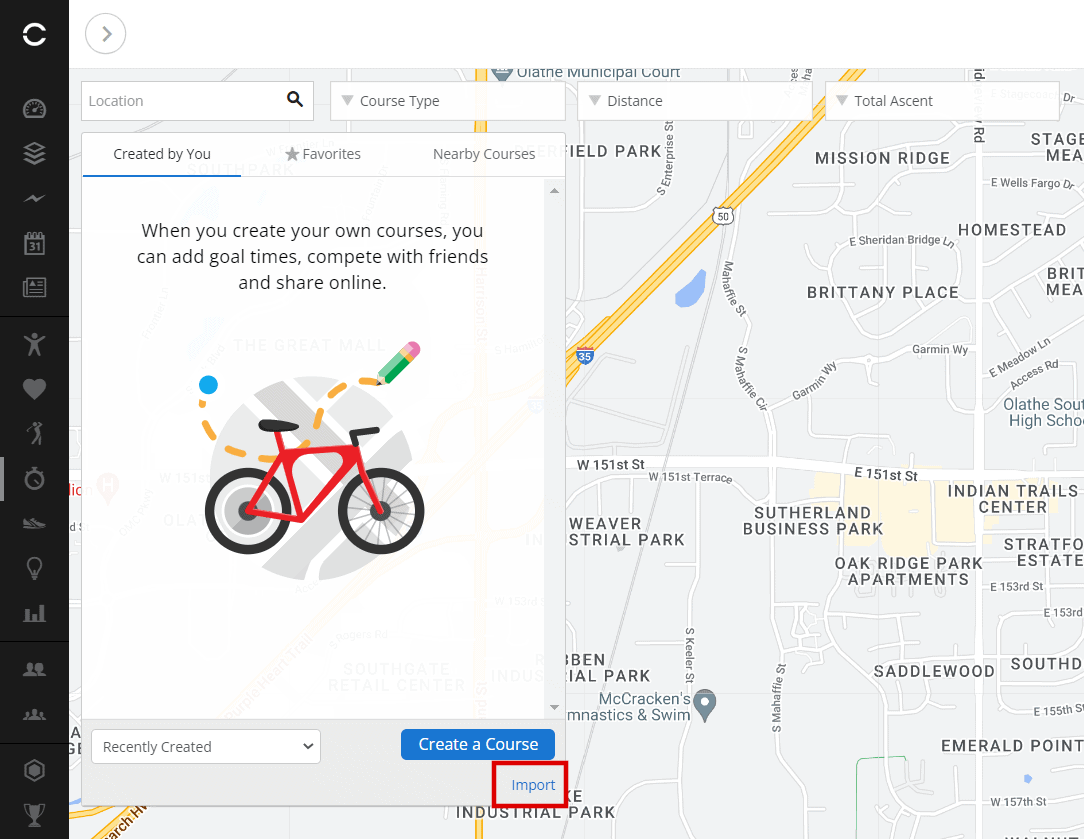
- Click on “Save New Course”
Now your course should be available in Garmin Connect. To put it on your Garmin Edge or Garmin watch, here are the additional steps:
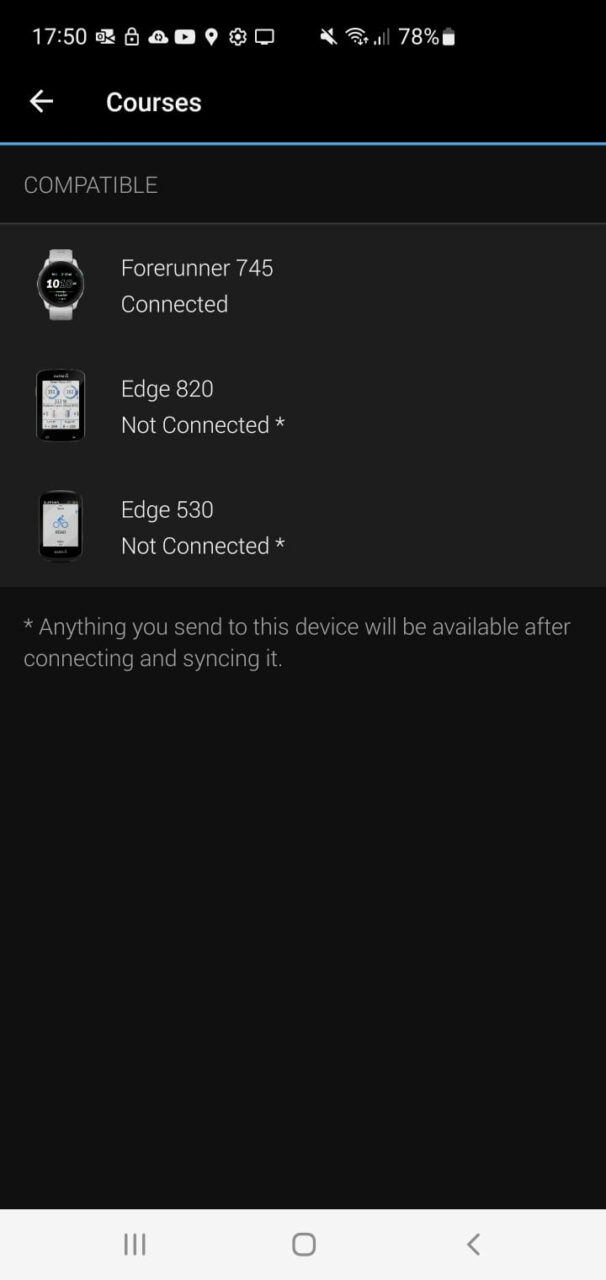
- Open the app on your smartphone, go to courses, and click on your new course.
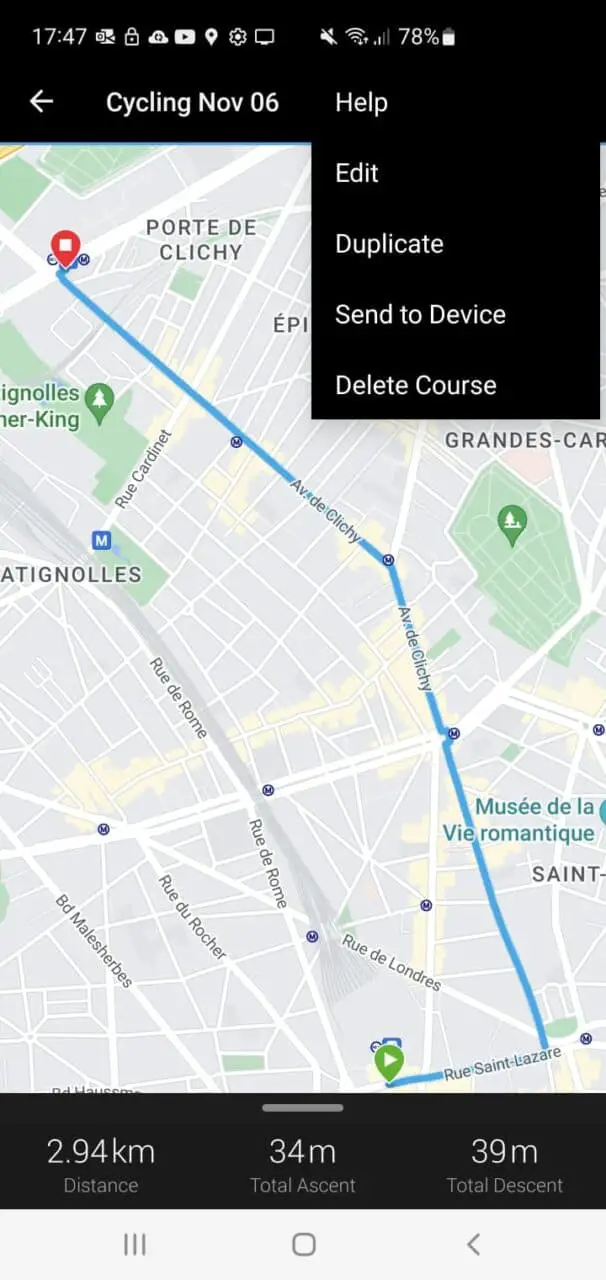
- Click on the dots in the top right corner and click “send to device”.
- Select your Garmin watch or Garmin Edge:
In this procedure, the importance is to use the course import button shown earlier. Indeed you may have noticed there is an upload icon on top of the Garmin Connect page. You should NOT use that button to upload a GPX created by other tools.

Indeed, this button is to import activities and most online tools create GPX routes. GPX routes are compatible with Garmin courses but not activities.
What if my GPX is an activity?
If are confident that your GPX file corresponds to an activity, but it doesn’t work with Garmin Connect activity upload. My advice is also to use the AllTrails converter. This time select “GPX track” instead of “GPX route”.
Then upload the GPX provided by AllTrails, and upload it with the activity button you see on the home screen in the top right-hand corner.
AllTrails will strip the GPX file of all unnecessary information and make sure the GPX is compatible with Garmin Connect activities.
Can I also upload GPX to Garmin with my smartphone?
Absolutely! In fact, it is much easier with the Garmin Connect smartphone app. Indeed, the smartphone app won’t let you upload an activity but only courses!
The thing is, a GPX “activity” can be uploaded as a course, your time/pace is stripped down along the way, but it does work. On the other hand, a GPX “course” cannot be imported as an activity since the time/pace information is missing. In short, in a Garmin course, you can upload both a GPX “activity” and a GPX “course”.
So, as the smartphone app only has the most permissive option, there is no risk of mixing things up and getting an error. This is unfortunately what happens a lot to people using the Garmin Connect website… That’s the reason why the smartphone app is probably easier to use.
Here are the steps to upload a GPX to Garmin with a smartphone:
- Go to https://www.alltrails.com/converter
- Upload your GPX file
- Select “Downlad as GPX Route“
- Click on “Convert file” to download the new GPX.
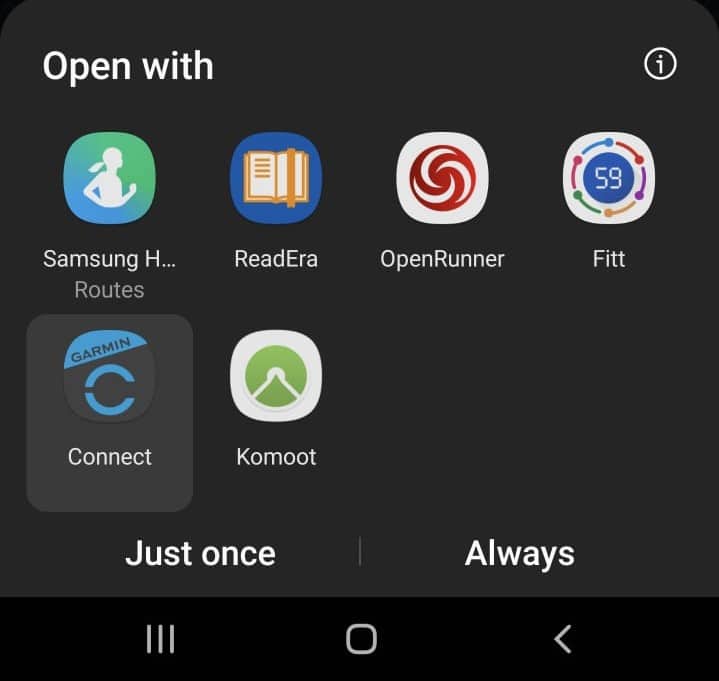
- Open the new GPX on your smartphone with Garmin Connect
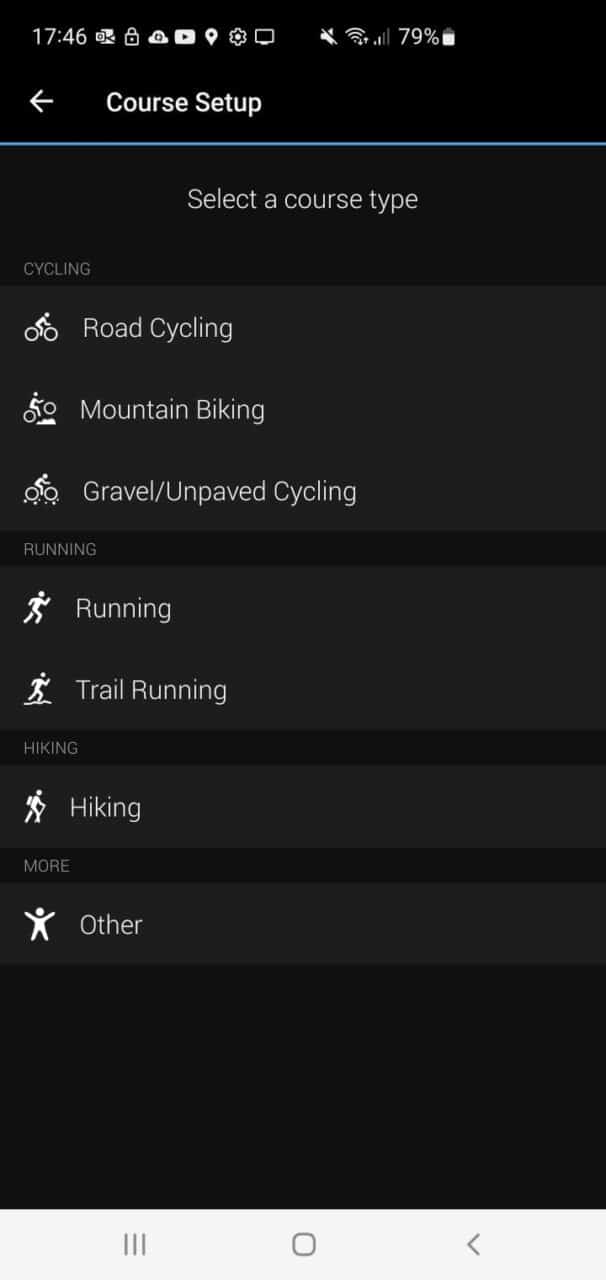
- Select the type of sport
- Select “send to device”
- Select your Garmin watch or Garmin Edge

And that’s it! Quite easy right? 🙂
I always advise going through AllTrails converter, because the GPX files created by other tools are sometimes a bit wonky. Going through AllTrails should ensure it works with Garmin.
If going through this tutorial did not help, then that means your GPX may have a problem. In the rest of this article, I explain the differences between some types of GPX files. Reading it may help you find what your problem is and find an appropriate solution. But it is a more “advanced” fix.
If you find these tips useful, make sure to also read my Garmin Connect tour guide where I share other tips like tools to synchronize activities:
Garmin Connect: tour guide, compatibility, and useful tips!
Understanding the difference between a GPX route and GPX track
On the Garmin Connect website, there are two ways to import a GPX: as an activity, or as a course. These two importing options are linked to the different ways GPX files can be built. The different apps or interactive tools online will build their GPX file differently according to the purpose.
The most common uses of GPX files are “routes” and “tracks”. Let’s have a quick look at how Garmin defines a route and a track:
Routes
A route is a sequence of waypoints, determined by coordinates, where the path between these points is not specified. The purpose is to let the GPS hardware calculate the best path between these points. A GPX route does not store any information about time.
Tracks
A track is a sequence of waypoints, determined by coordinates, where the path to be taken is important. It is used to follow an exact hike or to replay an activity someone performed before. In particular, a track does embed the time at which the waypoints were taken.
The most important difference is in the fact that routes do not store any information about time. It’s a fundamental difference that explains how Garmin handles these files. One can be used as an activity, and the other cannot.
Difference between an activity and a course on Garmin
An activity is a course you have followed where the time was recorded. In fact, other things can be recorded in an activity, such as the heart rate. But to simplify let’s stay with this simple definition.
Now you may have understood the link between Garmin activities and courses, and their GPX counterparts:
- A Garmin activity is similar to a GPX track.
- A Garmin course is similar to a GPX route.
So when you are given a GPX file, you are supposed to upload a GPX track into an activity and a GPX route into a course. Garmin does have the two upload options on the Garmin Connect website, though uploading a course is kind of hidden in the menu.
Nice hint: as a GPX track gathers more information than a GPX route, it is often possible to upload a GPX track as an activity AND a course. Whereas a GPX route can only be uploaded into a course.
How to differentiate between a GPX track and a GPX route?
So the thing is, the many GPX tools online will either create a track or a route without always telling you. Hopefully, there is a simple way to know: open the .gpx file with a text editor such as Notepad.
On Windows, you can do that by doing: Right click → Open with → Notepad.
Then, if your file looks like this:
<trkpt lat="48.875433" lon="2.325515">
    <ele>43.933492</ele>
    <time>2022-08-08T19:10:32.358Z</time>
</trkpt>
<trkpt lat="48.875509" lon="2.326045">
    <ele>43.933492</ele>
    <time>2022-08-08T19:10:38.664Z</time>
 </trkpt>
Then your GPX is a track! Notice there are “time” tags and “trkpt” for “track points”.
If instead, it looks like this:
<rtept lat="48.875433" lon="2.325515">
    <ele>43.933492</ele>
</rtept>
<rtept lat="48.875509" lon="2.326045">
    <ele>43.933492</ele>
</rtept>
Then your GPX is a route! Notice the “rtept” which means “route points”.
You may have other tags than <ele> in your file. What is important is to spot if it’s written “trkpt” or “rtept”.
What to do next?
The two examples I gave above do import into Garmin Connect, though they do need some additional lines around to work (find the complete version here).
If you have more information than elevation (<ele> tags) and time (<time> tags) for a file with track points (<trkpt> tags), try to remove the other tags.
If your file has route points (<rtept> tags), strip it to only keep one elevation tag per route point.
Once your GPX is stripped down. Keep in mind that a GPX with route points can be imported into Garmin courses only, whereas GPX with track points can be imported into activities and courses.
I hope it helps! If it does, do not hesitate to leave a comment below.
Share on:


My gods, after flailing for hours for a fix I stumbled on your advice, which worked perfectly. Bravo for hacking a way through the dense Garmin interface jungle.