Changing Wahoo Kickr cassette: what you need to know
Share on:
Thinking about buying a Wahoo Kickr? For some people, direct-drive trainers like the Wahoo Kickr can be a bit worrying at first. People generally wonder about being able to take the rear wheel off their bike to set it up on the trainer and also which cassette they need on their trainer.
Let’s make sure you are ready to train for the winter months (and more when you’ll get addicted to it :p)! Let’s dig into the world of cassettes and see what’s best for your Kickr and how to change it.
Do I need to change my Kickr cassette?
The Wahoo Kickr is sold with an 11-speed cassette compatible Shimano freehub body which is compatible with most recent bikes. If that’s not the case for your bike, then you will have to change the cassette. As for the Wahoo Kickr Core, it is sold without a cassette, so you will need to buy one.
If you bought a Wahoo Kickr, you only need to change the cassette if your bike cannot handle an 11-speed cassette compatible with Shimano’s freehub body. First, you need to check if your bike is compatible with the 11-speed. Two options for that:
- Just go to your bike and count the number of cogs on your rear derailleur.
- If you know the brand and model of your bike, just google it and go to the manufacturer’s website to confirm its specs.
If it is ok for 11-speed, then you need to verify that it is compatible with the Shimano freehub body – meaning it will work with Shimano’s inter-sprocket spacing. Start by locating the brand of your cassette on your bike; it’s written near the smallest gear. You are most likely to have a Shimano, a SRAM, or a Campagnolo.
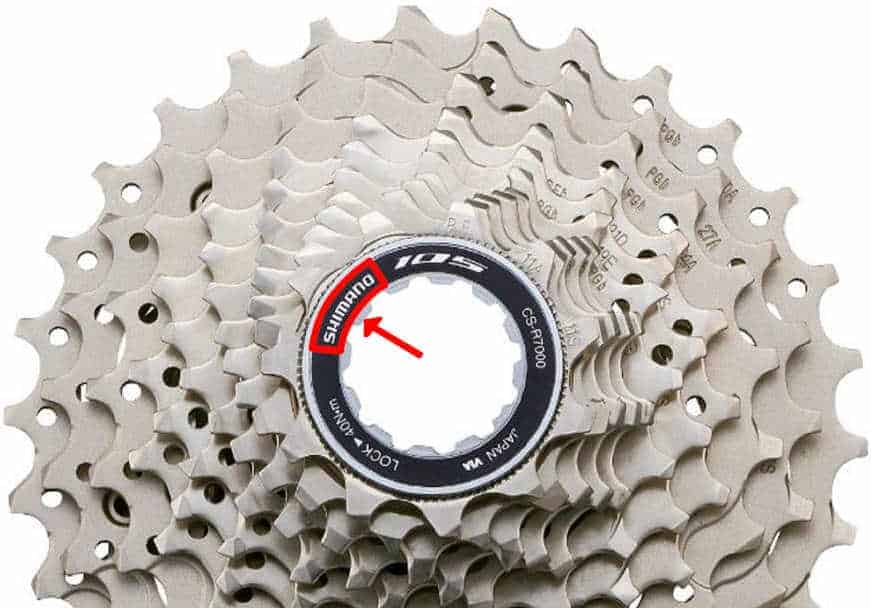
If you have a Campagnolo cassette on your bike, you will need to buy a different freehub for your Kickr and another cassette. Otherwise, Shimano & SRAM are compatible with the Shimano freehub body. Actually, Miche, IRD, and Sunrace are also brands of cassettes compatible with it.
Now you know if your bike can handle the 11-speed cassette. If that’s not the case or if you bought a Wahoo Kickr Core, you will need to buy a specific cassette for your trainer. Let’s see in the next paragraph what cassette you need to buy.
What cassette do I need for Wahoo Kickr?
You need a cassette compatible with your bike derailleur for your Wahoo Kickr. It is recommended to have the same cassette as your bike on the Kickr. This will provide you with the same gearing ratios and sensations you are used to when riding outdoors.
The best option is to buy the same cassette for your trainer as on your bike. Not just the brand but also the same gear range. Why?
- Same gear ratios => same feeling in your legs
- Best shifting performance
- Compatible with the rest of your drivetrain:
- no need to re-index your gears each time you hop on the Kickr
- no need to worry if the chain length is ok
- no risk of over-stretching the chain
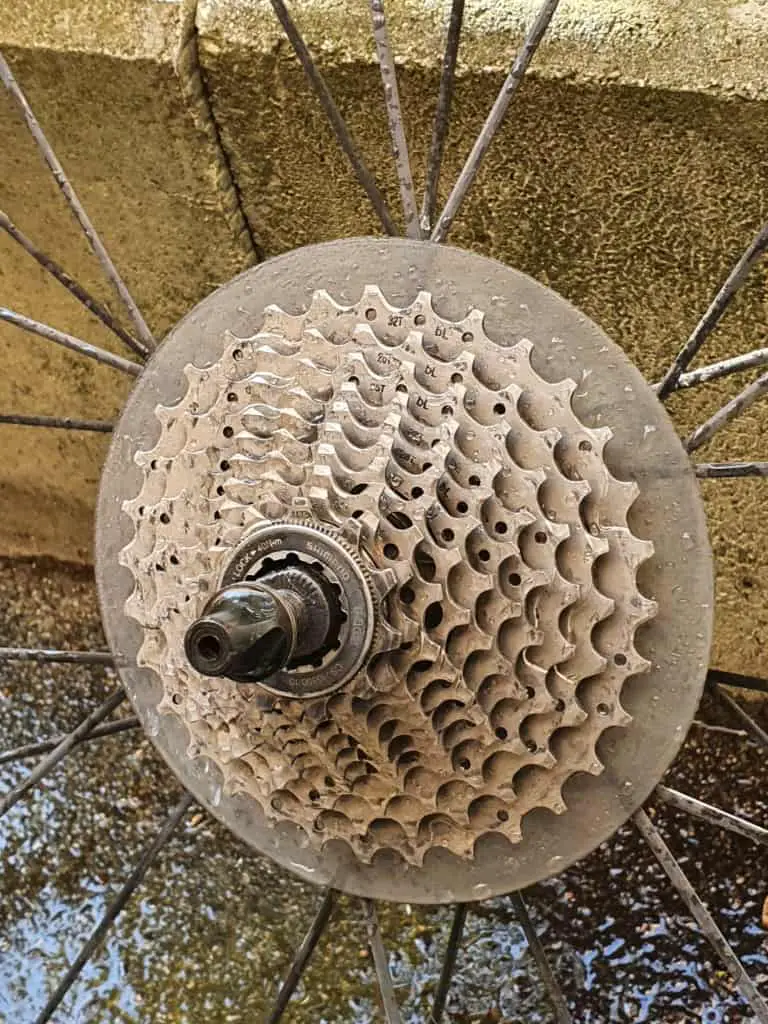
If you are unsure about the gear range of the cassette on your bike, you can count the teeth on the small cog and on the biggest cog. Or look for the number stamped on the cogs. Nowadays on a road bike, a common gear range on a cassette is “11-32”, where “11” is the number of teeth on the smallest cog and “32” the number of teeth on the largest cog.
Can you use a cassette with a different gear range on your Kickr?
It is possible to use a cassette with a different gear range on your Kickr from your bike. You need to make sure it is compatible with your bike’s drivetrain. And you need to check the chain length is ok with the new cassette, as well as the gear indexation.
One reason to have a second cassette with different gear ratios could be to have the possibility to switch it with the one on your outdoor bike from time to time. For instance, using a classic “11-28” on your bike and having an “11-32” on your trainer as a backup cassette for your next trip to the mountains.
If you are using the same bike indoor and outdoor, be careful if you are using different cassettes that the chain will be at the right length and not overstretched by the change. You’ll probably have to consider having a second chain with a quick link to change it from time to time. This is not very practical to do. I would not recommend it.
If you want a different cassette, it is best to have a bike dedicated for your indoor training and one for your outdoor rides.
Would a 8, 9 or 10-speed cassette work on Wahoo Kickr?
A 8, 9, or 10-speed cassette will work on Wahoo Kickr. You will have to install the 1.8mm spacer provided with your Kickr. If your cassette also includes a spacer, you will have to add this additional spacer to the 1.8mm spacer.
Would a 12-speed cassette work on Wahoo Kickr?
Wahoo Kickr has been designed for 8 to 11-speed cassettes. But you can install a 12-speed cassette on your Wahoo Kickr if you buy the correct freehub body. The Kickr XDR freehub body will allow 12-speed SRAM cassettes for instance.
Let’s look at some examples:
Campagnolo 12-speed cassettes:
If you mount the Campagnolo-specific freehub body on your Kickr, it will be compatible with Campagnolo 12-speed cassettes. It will work with Kickr ’18, ’20, and Kickr Core.
SRAM 12-speed cassettes:
SRAM 12-speed cassettes for road bikes are only compatible with the SRAM XDR freehub body. You can buy this freehub body for your Wahoo Kickr. It will work with Kickr ’18, v5, and Kickr Core.
SRAM 12-speed ‘SX’ & ‘NX’ cassettes:
SRAM 12-speed ‘SX’ and ‘NX’ cassettes for mountain bikes are compatible with a standard Shimano freehub body.
Can the cassette on Wahoo Kickr wear out?
Riding your bike indoors on your Kickr will wear out your cassette, same as outdoors. If your chain starts skipping and popping, it is likely that your cassette and/or your chain are worn out. For best performance, always replace a worn-out cassette and check it regularly for signs of wear.
If you perform regular visual checks of your cassette on your Kickr, you will be able to notice the state of its teeth. If the teeth start getting damaged, it is most likely that your cassette is worn out. Generally, the chain will start skipping when pedaling once the cassette wears out.
If you don’t want your cassette to wear out too fast, I recommend you also check your bike chain. A worn chain will be overstretched and start damaging the cassette. You can check the state of your bike chain with a bike chain wear indicator tool such as this one. On the “0.75” side, if the tool goes in, it means your chain is worn out at 75% and will need to be replaced soon. On the “1.0” side, if the tool goes in, it means your chain is worn out at 100% and is damaging your cassette. Change it ASAP.

In this case, the chain will have to be changed soon but it is not critical yet.
How to change Wahoo Kickr cassette?
Assuming your cassette is the one provided by Wahoo with the Kickr or a similar type of lock ring cassette. You will need a lock ring tool and a chain whip to change your cassette.
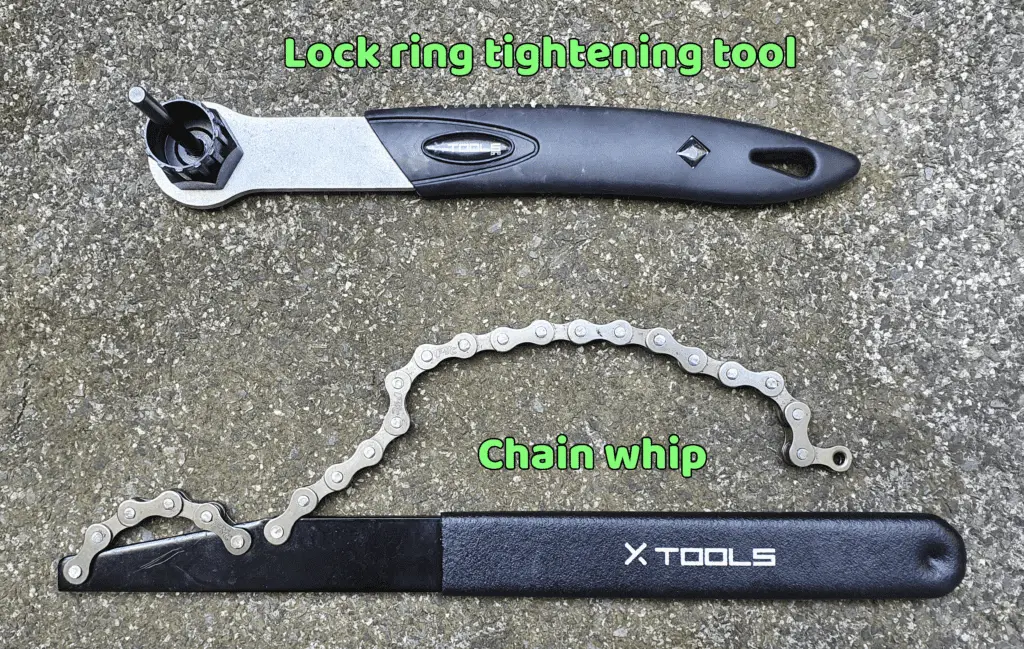
Now just follow the steps below to first remove your cassette and then mount a new cassette on your Kickr.
Note: I am going to show you the steps on my Tacx Neo since my cassette is really dirty and needs a clean-off. But don’t worry it is exactly the same as on a Wahoo Kickr.
Steps to change a cassette on a Wahoo Kickr:
1. Remove your bike from the Kickr
2. Remove the quick-release skewer from the Kickr

3. Engage the lock ring tool into the splines & notches of the cassette
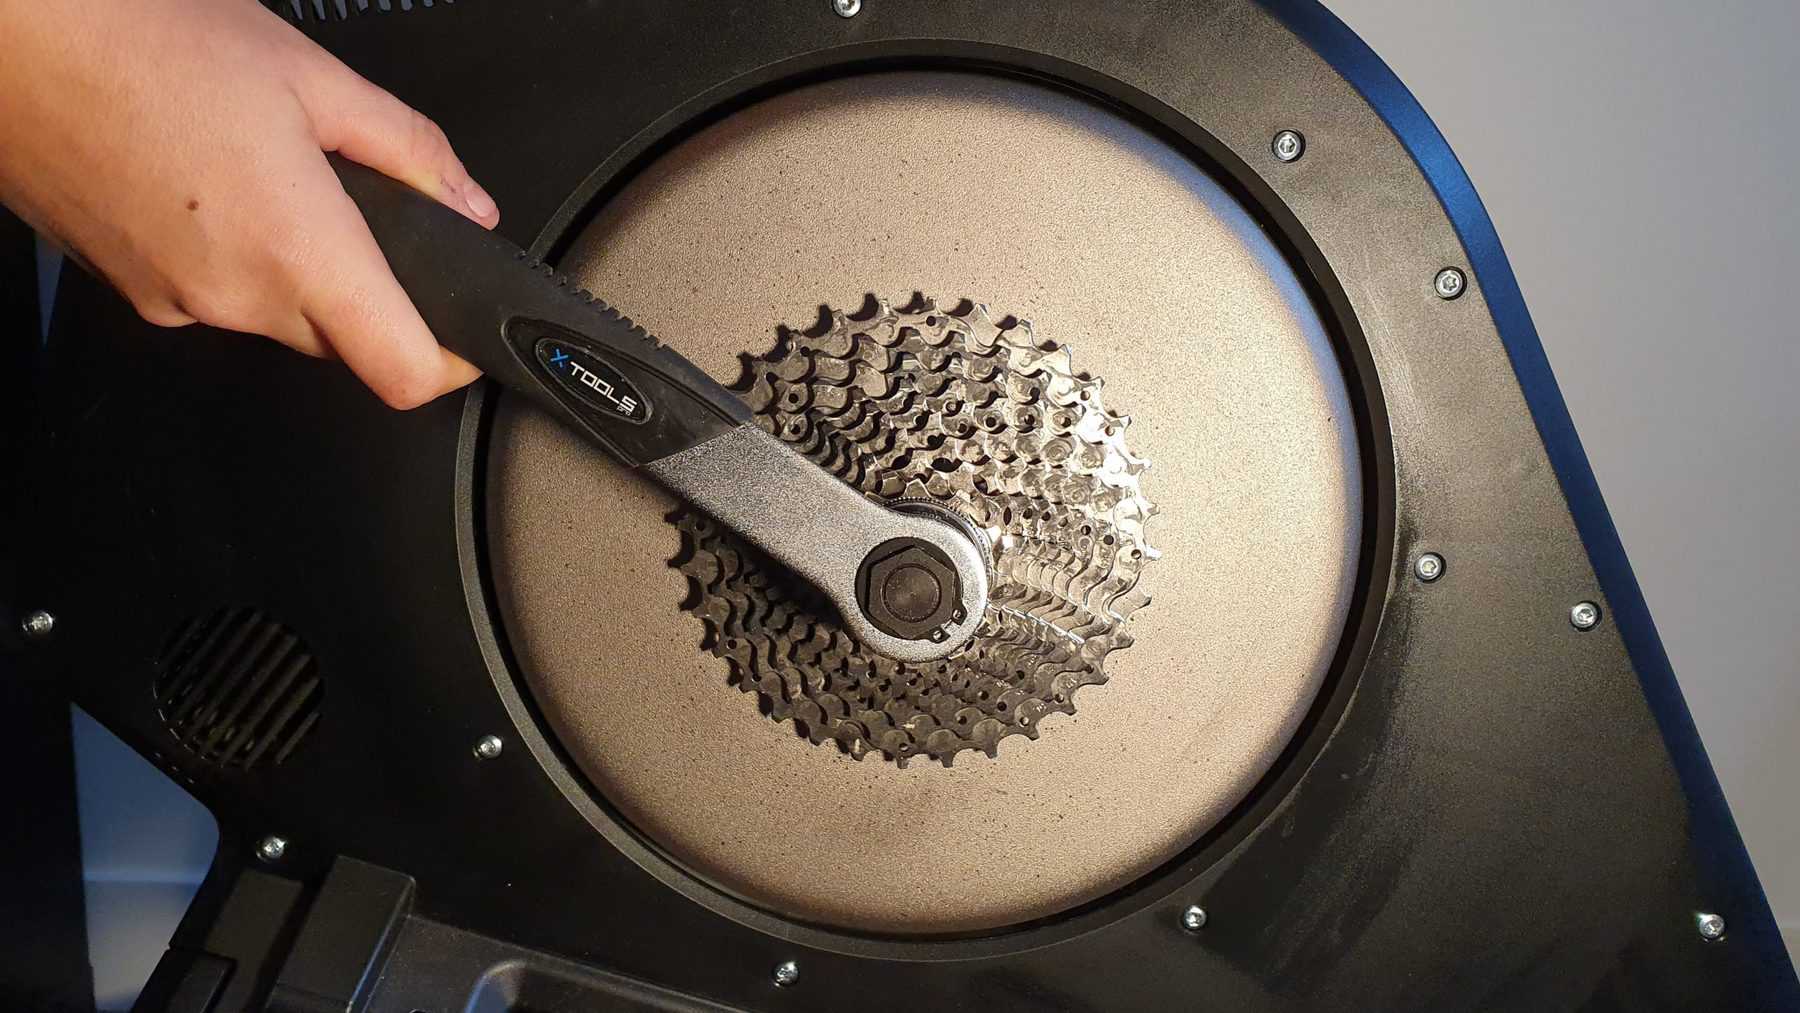
4. Hold the biggest cog in the clock-wise direction with the chain whip tool
To untighten the cassette you will have to turn the lock ring tool anti-clockwise. Therefore you need to place the chain whip to prevent the cassette from rotating while you are turning the other tool. See the picture below.
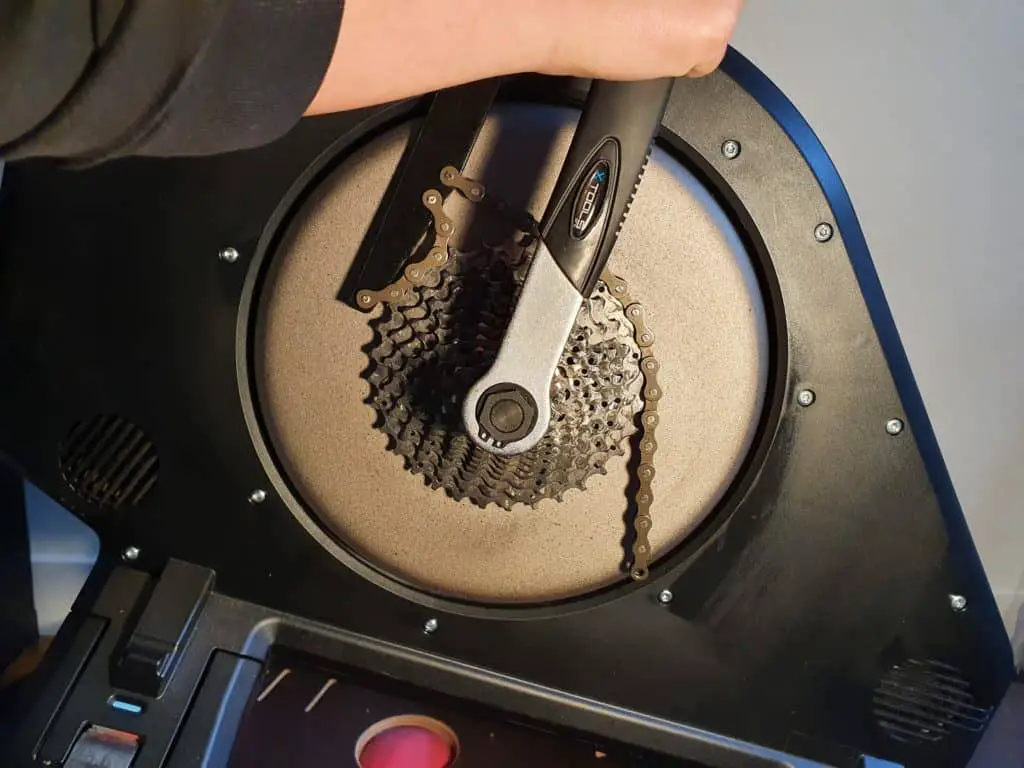
5. Turn the lock ring tool in the anti clock-wise direction to untighten the cassette
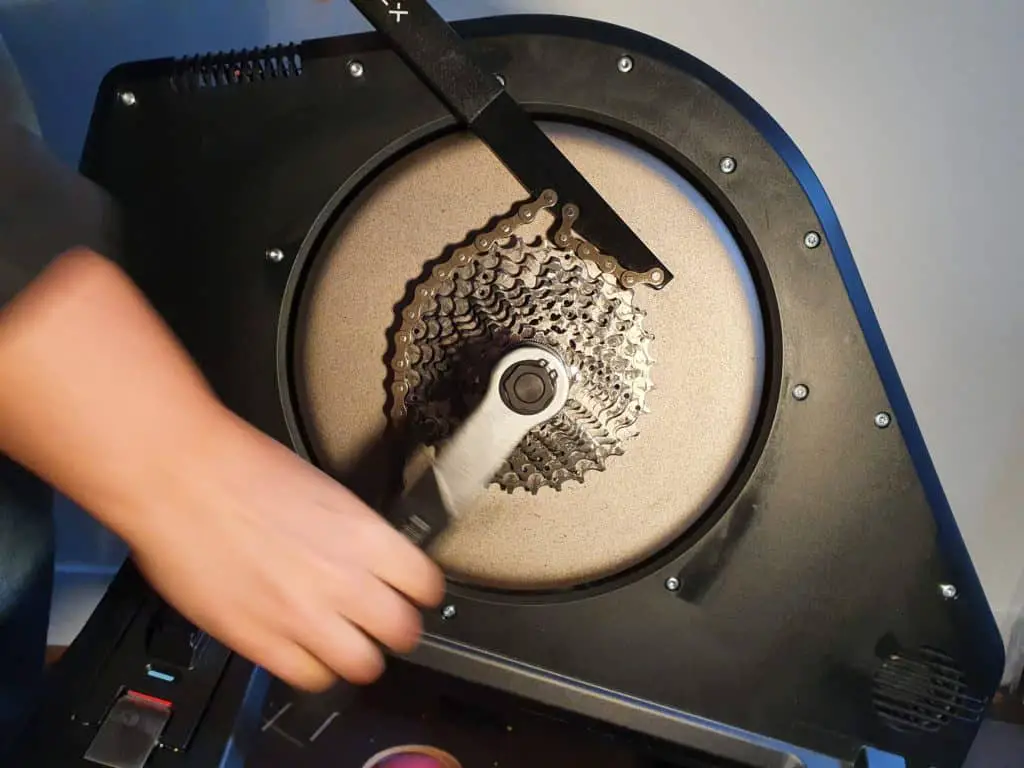
6. Once it is turning freely, keep unscrewing the locking ring until you can remove it
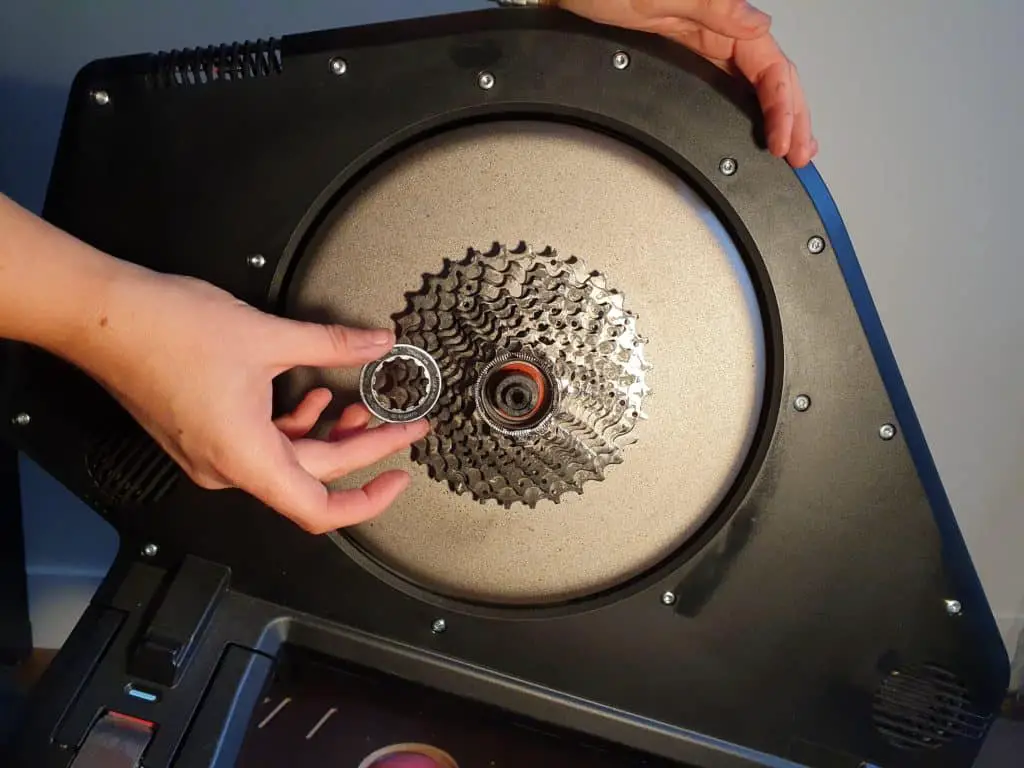
7. Slide the cassette off the freehub body
8. Locate the largest gap on the freehub of the Kickr
The freehub body has a number of notches on it. There is one wider gap on the freehub body that you need to locate.
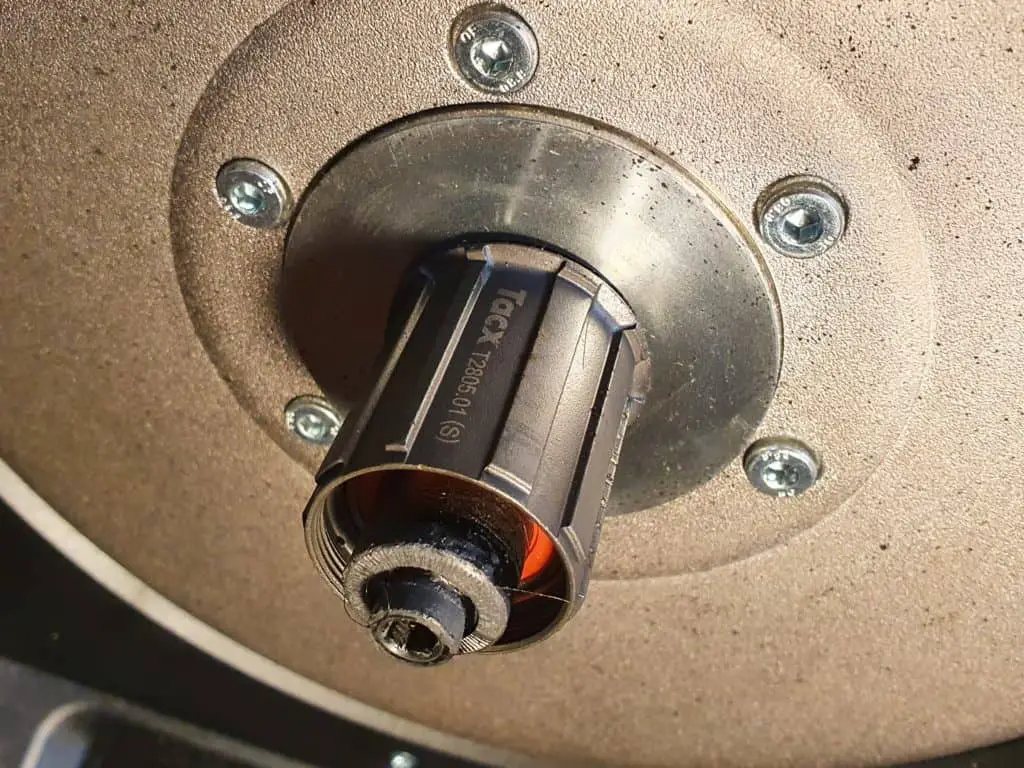
9. Locate the largest gap on the cassette
Locate the widest spline on the rear of the cogs of the cassette to be able to align it with the widest notch on the freehub body.
10. Place the 1.8mm spacer if you are riding a 10-speed cassette or less.
If your cassette already comes with a specific spacer, don’t forget to add it after the 1.8mm spacer.
11. Align the cassette with the largest gap on the freehub body and slide it on it.
12. Do it for all the cogs (the smallest ones are generally separated from the big ones)
13. Now you can add the locking ring and tighten it manually
14. Insert the lock ring tool
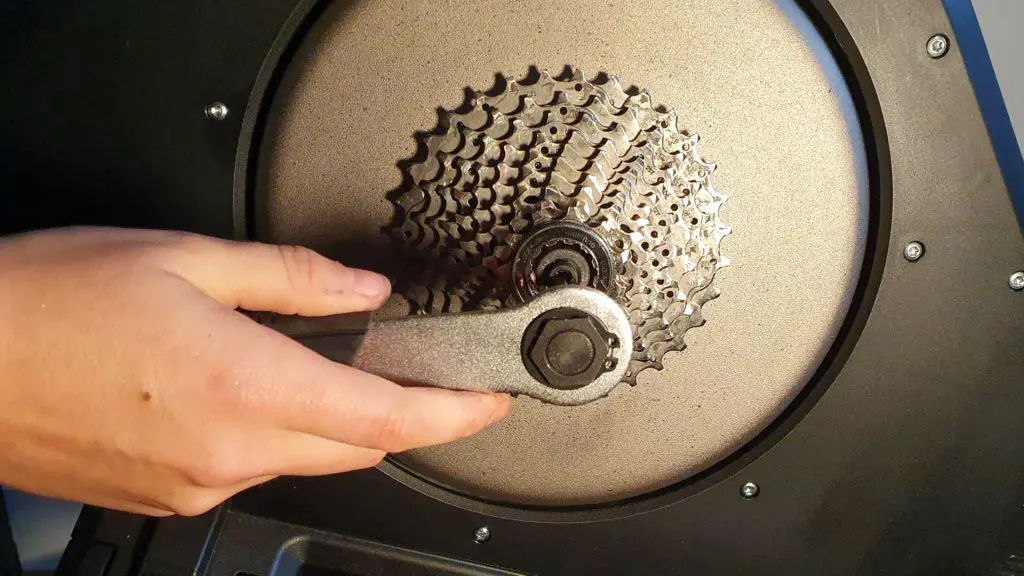
15. Place the chain whip on the biggest cog to prevent the cassette from turning
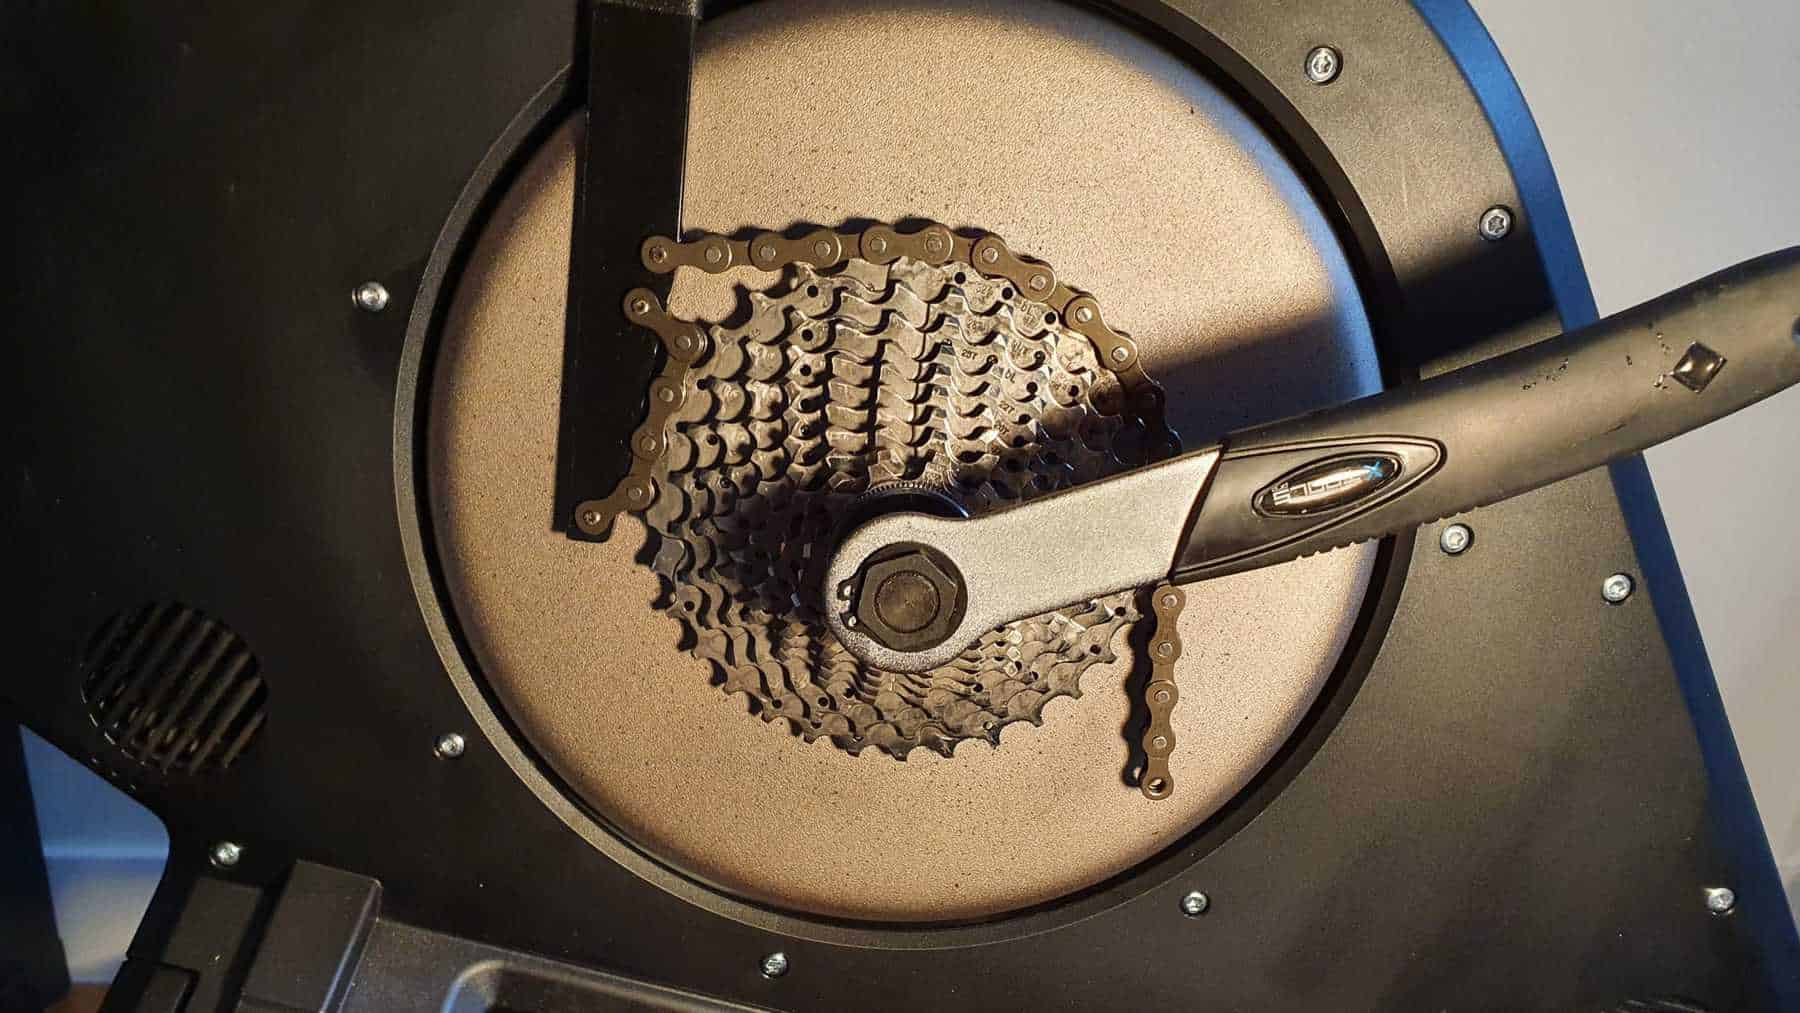
16. Tighten the lock ring with the tool until you no longer hear a clicking sound
17. Put the quick-release skewer back in place
If you enjoyed this article, I have made a selection of other guides I wrote for your Wahoo Kickr:
Share on:


